
garden
Starting Seeds Indoors
Everything you Need to Know
I can’t be the only one to admit that in the middle of winter when moments of sunshine blast my garden, I spend all my time dreaming about what my garden will look like come end of spring. The journey of growing seeds indoors just gets me back into the world of gardening sooner than if I wait to buy young seedlings from the local nursery.
Plus, I have to say, the idea of taking my own seeds, nurturing them until I can plant outdoors, and then taking my own seedlings outdoors and giving them that sectioned off part of the garden is SO REWARDING. Plus watching plants grow from the very beginning is not only rewarding, but way cheaper!
Starting vegetable seeds indoors can be a great way to get a jump start on the growing season and ensure that you have strong, healthy plants ready to transplant into your garden. Check out the tips below to help you get started on your indoor seed starting adventures:
Choose the right seeds:
Some seeds should be direct sow and not started in a seed tray. Look at seed packets for those that have a shorter germination time, such as tomatoes, peppers, and cucumbers. Avoid seeds that need a long period of warm weather to germinate, such as corn and melons.
Pick the right time:
The timing of when you start your seeds indoors is important. You want to start them early enough so that they have time to grow strong and healthy before transplanting them outside, but not so early that they outgrow their containers before it’s warm enough to plant them in the garden. A good rule of thumb is to plant seeds indoors about 6-8 weeks before the last frost date in your area.
Provide the right conditions:
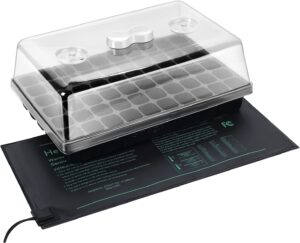
Seeds need warm temperatures, moisture, and some need light to germinate. Keep your seeds in a warm room (around 70-75 degrees Fahrenheit) and make sure you keep the seedlings moist. You can use a heat mat to keep the soil warm and a plastic dome or clear plastic bag to create a mini-greenhouse effect to keep the moisture in. A bright, south-facing window can also provide enough light for seed germination.
Use the right seed starting containers:
Small seed trays or pots are ideal for starting seeds indoors. You can also use plastic cups or yogurt containers with drainage holes punched in the bottom. Fill the containers with a seed-starting mix, which is a lightweight, sterile soil specifically formulated for seed germination.
Keep seed starting mix warm and moist:
Keep the soil moist, but not waterlogged. A spray bottle or mister can be used to mist the soil if it starts to dry out. Placing the seed trays on a heat mat will help to ensure the soil stays warm enough. Once the seedlings have emerged, remove the plastic dome or bag to allow the seedlings to grow.
Transplanting:
Once the seedlings have grown their first set of true leaves, it’s time to transplant them into larger containers or into the garden. Be sure to harden them off first by gradually exposing them to outdoor conditions over a period of a week before transplanting.
Okay, so let’s elaborate on a few of these topics pertaining to starting seeds indoors that we mentioned above and some additional topics like: stratification, grow lights, and some products we always have on hand when we start seeds indoors.
What is Stratification? Do people really put some seeds in the refrigerator before planting them?
When it comes to planting seeds, there are a few things to keep in mind to ensure they germinate and grow successfully. One important factor to consider is whether or not the seeds need to be refrigerated before planting.
There are certain types of seeds that require a period of cold stratification before they will germinate. Cold stratification mimics the natural process that occurs in nature, where seeds are exposed to cold temperatures before they are able to sprout. This process helps to break down the seed coat and activate the growth hormones, making it easier for the seed to germinate once it is planted.
Examples of seeds that require cold stratification include:
Peonies
Lavender
Delphiniums
Foxgloves
Poppies
Lupines
To cold stratify seeds, simply place them in a sealed plastic bag or container with a damp paper towel. Make sure to label the container with the name of the seed and the date. Place the container in the refrigerator for the recommended period of time, which can range from a few weeks to several months, depending on the type of seed.
Once the cold stratification period is complete, the seeds can be planted in soil or a seed-starting mix according to the instructions on the seed packet. Keep in mind that germination may take longer than usual, but once the seedling emerges, it should be strong and healthy.
It’s also important to note that cold stratification is not necessary for all types of seeds, and in fact, some seeds can be damaged by cold temperatures. Always check the seed packet or consult with a gardening expert before refrigerating any seeds.
Cold stratification is an important step in the germination process for certain types of seeds. By refrigerating the seeds before planting, you can ensure that they will sprout and grow into healthy plants. However, not all the seeds require this process, so it’s crucial to check the seed packet before refrigerating any seeds.
Will your seeds germinate better if you soak them first?
Vegetable gardening is a fun and rewarding hobby, and one of the keys to success is properly preparing your seeds before planting. One technique that can be especially beneficial for certain types of seeds is soaking them in water before planting.
Soaking seeds helps to soften the seed coat, making it easier for the seed to germinate and sprout. This can be especially helpful for seeds that have a tough seed coat, such as beans, peas, and certain types of squash. By soaking these seeds, you can speed up the germination process and give your seedlings a better chance of survival.
To soak seeds, simply place them in a bowl or jar and cover them with water. The amount of water you use will depend on the size of the seeds and the quantity of seeds you are soaking. You should soak the seeds for about 12-24 hours. Some seeds, such as peas and beans, can be soaked for up to 48 hours.
It’s important to note that not all seeds need to be soaked before planting. Small seeds such as lettuce, carrot, and radish, do not require soaking, and in fact, soaking them can cause them to rot before they have a chance to germinate. It’s always a good idea to check the seed packet or do some research to determine if the seeds you are planting require soaking before planting.
Another thing to keep in mind is that after soaking, you need to drain the plant seeds and let them dry on a paper towel before planting. This will help prevent any potential diseases and fungal growth that may happen if the seeds are too wet. Healthy seedlings are the goal, so eliminating fungal from the very beginning is key.
Soaking certain seeds in water before planting can be a beneficial technique to promote germination and give your young plants a better chance of survival. However, not all seeds require soaking, so it’s important to check the seed packets before planting. With a little preparation, you’ll be well on your way to a bountiful vegetable garden.
What is the best type of soil or potting mix for starting seeds? Is seed starting mix necessary?
The best kind of soil to start seeds indoors is a seed starting mix, which is a lightweight and sterile seed starting mix specifically formulated for germinating seeds. It is typically made up of peat moss, vermiculite, and perlite, which provide the perfect balance of water retention, drainage, and aeration for seedlings. It is also free from disease, pests, and weed seeds, which can harm young seedlings.
Another important factor to consider is pH level, which should be around 6.0-6.5 for most plants. A pH test kit can be used to ensure the soil is at the proper level. Nutrients can also be added to the garden soil, such as a slow-release fertilizer, to provide newly planted seeds with the necessary nutrients for growth.
It is also important to note that the soil moisture of a seed starting mix should be kept consistently moist, but not waterlogged, as this can lead to rot and disease. A spray bottle or a watering can with a fine nozzle can be used to gently water the soil and avoid disturbing the delicate seedlings. Additionally, it’s important to keep the seedlings in a warm and well-lit area to ensure they have the best possible chance of germinating and growing.
Best containers to use for starting seedlings indoors:
Seed starting in pots is a great way to get a head start on the growing season and save a little money at the local nursery. There are a few types of pots that are particularly well-suited for starting vegetable seeds.
One of the best options is biodegradable pots made from materials like peat moss, coconut coir, or even newspaper. These pots can be planted directly in the ground, so there is no need to disturb the roots when transplanting. Biodegradable pots are environmentally friendly and will break down naturally over time. Another option is plastic trays with seed cells, which are great for starting a large number of seeds at once. These trays can be easily moved to a sunny location or greenhouse and the seed cells make it easy to transplant seedlings into larger pots or the garden. If using plastic trays or cups, make sure a few drainage holes are created in the bottom to ensure water is draining properly. We want the seeds moist, but not drowning.
Another great option for starting seeds is using soil blocks. These are small blocks of soil that are formed by using a specialized tool. They are made of soil, compost, and other organic materials and are planted with a single seed. Soil blocks are great because they allow the roots to grow down, rather than around in a circle, which can help to reduce transplant shock. They also save space and are very easy to transplant into larger pots or the garden.
The best pots to start seeds are biodegradable pots, plastic trays with seed cells and soil blocks. Each of them have their own advantages and can be used depending on the requirements and quantity of seeds to be planted (and budget).
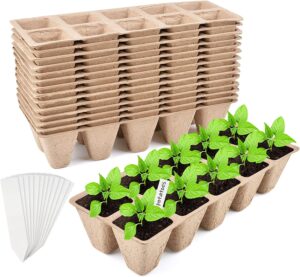
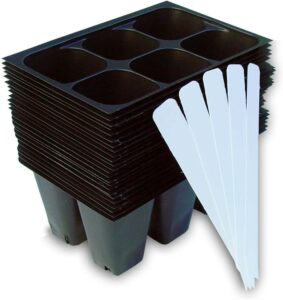
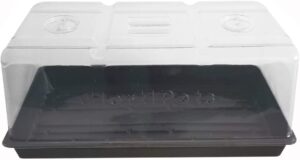
Here are a few containers we have been using:


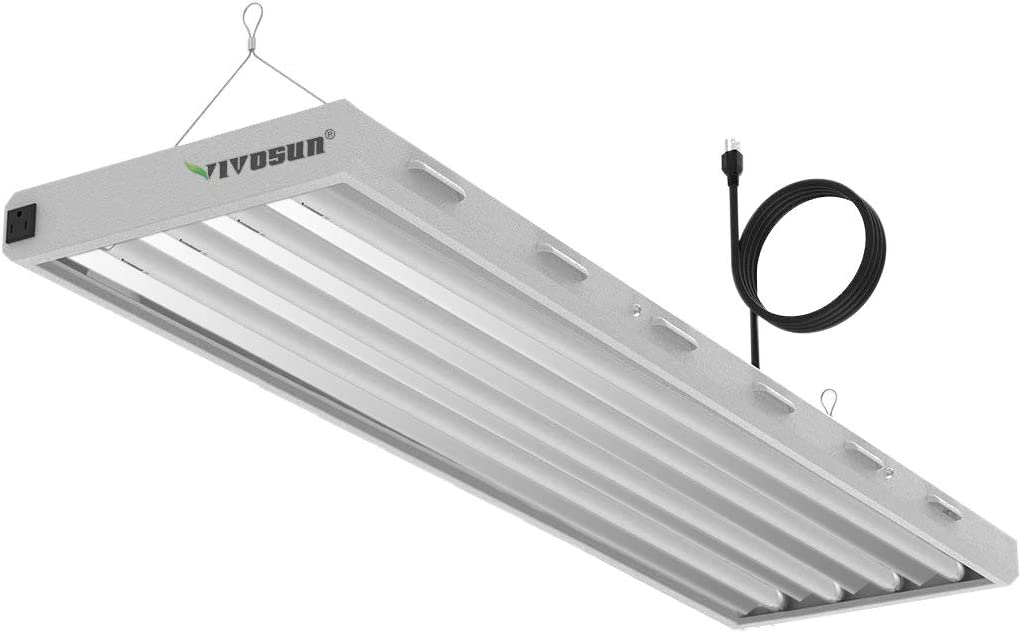
Types of grow lights to use:
When starting seeds indoors, it’s important to provide them with enough light to germinate and grow. A bright, south facing window can provide enough natural light for germination, but as the seedlings grow, they will need more light than that from a sunny window. One option is to use fluorescent grow lights. These lights provide a balanced spectrum of light that is ideal for seedlings. LED grow lights are also a good option. LED lights are energy-efficient and can be adjusted to provide the right amount of light for the seedlings.
It is also important to note that seedlings require a certain amount of light and darkness to grow properly. Be sure to provide 14-16 hours of light and 8-10 hours of darkness for your seedlings. This can be achieved by using a timer for your lights or manually turning them on and off.
A few lights we use are:

The other advantage to supplementing a south facing window with a great LED grow light is that you can control how close to your young seedlings the light is which will prevent leggy seedlings.
Leggy seedlings is when your seeds first pop out above the soil and search for light. If the light source is too far away from the top of the plants, they can grow up quickly, thus resulting in a “leggy seedling.”
When to transplant seedlings into larger containers:
When your seedlings have grown their first set of true leaves, it’s time to transplant them into larger containers or into the garden. This will give them room to grow and develop a strong root system. Be sure to choose containers that are large enough to accommodate the root system and have drainage holes in the bottom. When transplanting, be sure to bury the seedling deep enough so that only the first set of leaves is above the soil surface.
Hardening off your seedlings:
The hardening off period for plants is the process of gradually exposing them to outdoor conditions before transplanting them into the garden. This helps to reduce the shock of the transition and improves the chances of survival. To harden off seedlings, start by placing them in a sheltered location, such as a porch or cold frame, for a few hours each day. Over the course of a week, gradually increase the amount of time they spend outside, and expose them to more direct sunlight and wind. Be sure to protect them from frost and extreme temperatures. Typically, this hardening off period happens for most seeds after your last expected frost date.
Starting seeds indoors must haves:
Indoor seed starting does not have to be intimidating. Like anything else, approaching slow will help get your seed starting dreams up and going without being overwhelming.
By following these seed starting tips, you’ll be on your way to growing strong, healthy vegetable plants that are ready to thrive in your garden.
Happy gardening!
love this article on keeping your greenhouse pollinated?
SHARE IT ON PINTEREST
Let’s connect! Follow along on Instagram, Facebook, and Pinterest. If you make this recipe, I’d love to see! Tag your instagram versions with @homestead.onthehill and
#homesteadonthehill.