garden
Soak Seeds Before Planting: Speed up Germination

Starting seeds at home is one of those simple joys that makes you feel like a great gardener—even if you’re just working with a windowsill and a few pots. Not to mention, it gets you thinking about gardening well before plants are available to purchase at your local garden center. Whether you’re growing veggies for the backyard or flowers for the front porch, seed starting gives your plants a strong beginning.
One old-time gardener’s trick that’s making a comeback? Soaking seeds before planting. It’s a tiny extra step that can make a big difference. By mimicking what happens in nature—think spring rains softening the soil and waking up seeds—we’re helping our seeds get a head start.
This easy little hack can speed up the germination process, improve your germination rate, and even shave days off the germination time. And if you’ve ever stared at a tray of dirt wondering if anything will ever sprout… you’ll definitely want to keep reading.
Why Soak Seeds?
Soaking seeds is one of those simple things that can make a huge difference in your gardening success. Many seeds, especially those with hard coats or a tough outer shell, take a long time to germinate because water has a hard time getting inside. Giving them a good soak helps soften that protective coating, allowing moisture to reach the seed core faster. This speeds up the germination process and can lead to a better germination rate. Think of it as doing what Mother Nature does with spring rain—but speeding up the process and on your timeline. If you’ve ever planted dry seeds only to wait forever for something to sprout, soaking might be the extra step you didn’t know you needed.
The Germination Process Explained
Once a seed is in the ground—or nestled into a seed tray—it goes through a pretty amazing transformation. First, the seed needs to absorb enough water to trigger internal changes. That’s where soaking can help. Seeds swell up, the seed coat softens, and eventually the first sprout breaks through. The whole thing depends on proper soil moisture, steady moisture levels, and the right soil temperature. If any of those are off—too dry soil, too much water, or planting at the wrong time—you might see delays or no growth at all. By giving your seeds a little jump start with soaking, you’re helping move things along toward healthy plants.
We have an entire article on starting seeds indoors; including information on stratification, germination, good start mixes, bio dome seed starting systems, grow lights, etc.
Seeds That Benefit from Soaking
Some seeds just need a little more love. Larger seeds like green bean seeds, pea seeds, sweet peas, snap beans, and pole beans tend to have thicker seed shells that can slow down water absorption. Soaking them helps break through that barrier for faster germination. The same goes for dry beans, bush beans, morning glories, and even red Chinese long bean. Many of these seeds have hard coats that take a long time to break down in the soil on their own. A lukewarm water soak can do in hours what nature might take days to accomplish—giving your vegetable garden and flower seeds the best start possible.
Seeds You Shouldn’t Soak
On the other hand, not all seeds are into soaking. Small seeds, like many flower seeds or tiny seeds used for herbs and greens, are often delicate and can absorb too much water too quickly. That might sound harmless, but it can actually cause damage before the germination process even starts. Some seeds—especially those adapted to dry conditions—germinate better when sown directly into moist soil without pre-soaking. Others require cold stratification (like lavender), which is basically nature’s way of saying “this seed needs a winter nap before it’s ready.” Always check the seed packet and consider the type of seed—because soaking isn’t always the best way to go.
How to Soak Seeds Properly
The actual soaking process is super easy. Just grab a shallow bowl and fill it with lukewarm water—not hot, just comfortably warm to the touch. Add your seeds (not too many—only the number of seeds you plan to plant), and let them sit for about 8–12 hours, or overnight. This is especially helpful for hard seeds like morning glory or sweet peas. If you’re using the hot water method (great for super tough seeds), pour hot water over them and let them soak as it cools. In the morning, drain them and plant right away in moist soil or place them on damp paper towels in a plastic bag for a little indoor seed sowing magic. The key is not soaking for too long, or you risk creating wet seeds that could rot before sprouting.
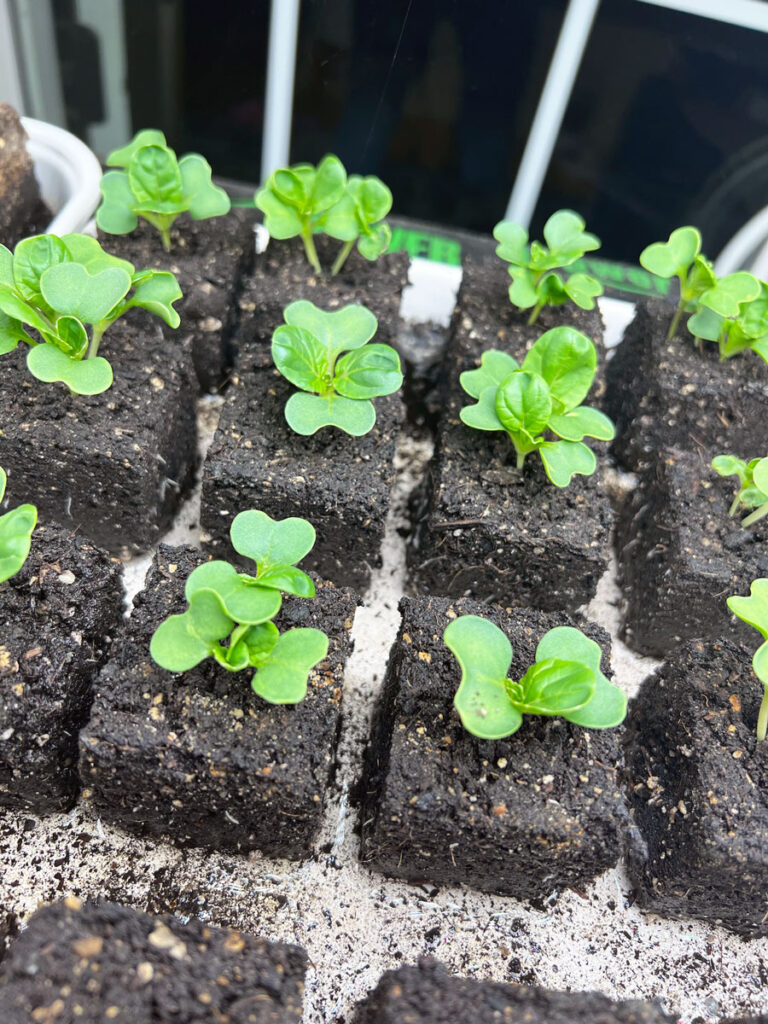
After Soaking: Planting for Success
After your seeds have had a good soak, it’s time to move them into some moist soil or a prepared seed tray. Handle those wet seeds gently—they’re more fragile than when dry, especially after sitting in water overnight. Make sure the soil isn’t too soggy or too dry; you want just the right moisture levels to support the start of new growth. Keep an eye on soil temperature, too—planting too early in cold soil can delay the germination process or cause seeds to rot. And don’t forget to check the weather forecast. Planting during dry conditions or right before much rain can throw things off, especially if your young plants sprout at the wrong time. Timing really is everything when it comes to turning soaked seeds into healthy plants.
FAQs
- Is soaking seeds always necessary?
Soaking seeds isn’t always a must—but for many hard seeds or those with a protective coating, it’s a good idea to give them a head start. A good soak can help break through the seed coat, speeding up the germination process and boosting your germination rate. For larger seeds like pea seeds, green beans, or morning glories, soaking is especially helpful. That said, smaller seeds or tiny seeds—such as most flower seeds—usually don’t need soaking, and too much water can actually harm them. As a general rule, consider the type of seed and check the seed packet for specific instructions. - What’s the general rule of thumb for soaking time?
The general rule of thumb for the soaking process is to leave seeds in lukewarm water for about 8 to 12 hours. An overnight soak is perfect for most seeds with hard coats, but avoid leaving them too long—too much soaking can lead to rot, especially in wet seeds. Seeds like sweet peas, dry beans, and pole beans benefit from a longer soak, while little seeds or those with soft outer shells may only need a couple of hours, if any at all. When in doubt, a short soak is better than a long time in water. - Which seeds should I avoid soaking?
Avoid soaking tiny seeds or those that easily absorb too much water. This includes many flower seeds, herbs, and certain perennials. These smaller seeds can become too soft and break down, especially if the moisture levels aren’t just right afterward. Also, some seeds naturally require cold stratification instead of soaking. When you’re not sure, check the seed packet or research the type of seed. Skipping soaking may actually improve your success rate in cases where dry seeds are better off going directly into moist soil or onto damp paper towels. - What’s the best way to soak seeds overnight?
To soak seeds safely overnight, place them in a shallow bowl and cover them with enough lukewarm water to fully submerge them—typically a lot of water isn’t necessary, just enough water to cover the seeds. Let them sit for 8 to 12 hours (overnight is easiest). For seeds with particularly hard shells, like morning glory or red Chinese long bean, you can try a hot water soak (let the water cool slightly before adding the seeds). After soaking, drain them and plant directly in moist soil, or transfer to a seed tray or damp paper towel in a plastic bag to encourage sprouting. This extra step gives many seeds a jump start on their new growth. - How do I know if my seeds need soaking or cold stratification?
It depends on the type of seed. Seeds with hard coats—like green beans, snap beans, sweet peas, and dry beans—typically benefit from soaking seeds to soften the seed shell. On the other hand, seeds that naturally germinate in cool seasons may need cold stratification, which mimics Mother Nature’s winter chill. If your seeds come from plants that would normally go dormant during dry conditions or cold weather, stratification may be better. When unsure, refer to the seed packet or research the best ways to handle specific types of seeds—especially if they were stored from last year. The important thing is to give your seeds the best start based on their natural needs and your current weather forecast.